How to Read a Chord Diagram
Chord diagrams are a quick and easy way to communicate which fingers go on which strings when playing a chord. Learning how to read a chord diagram is fairly straight-forward and even easier to learn than guitar tab.
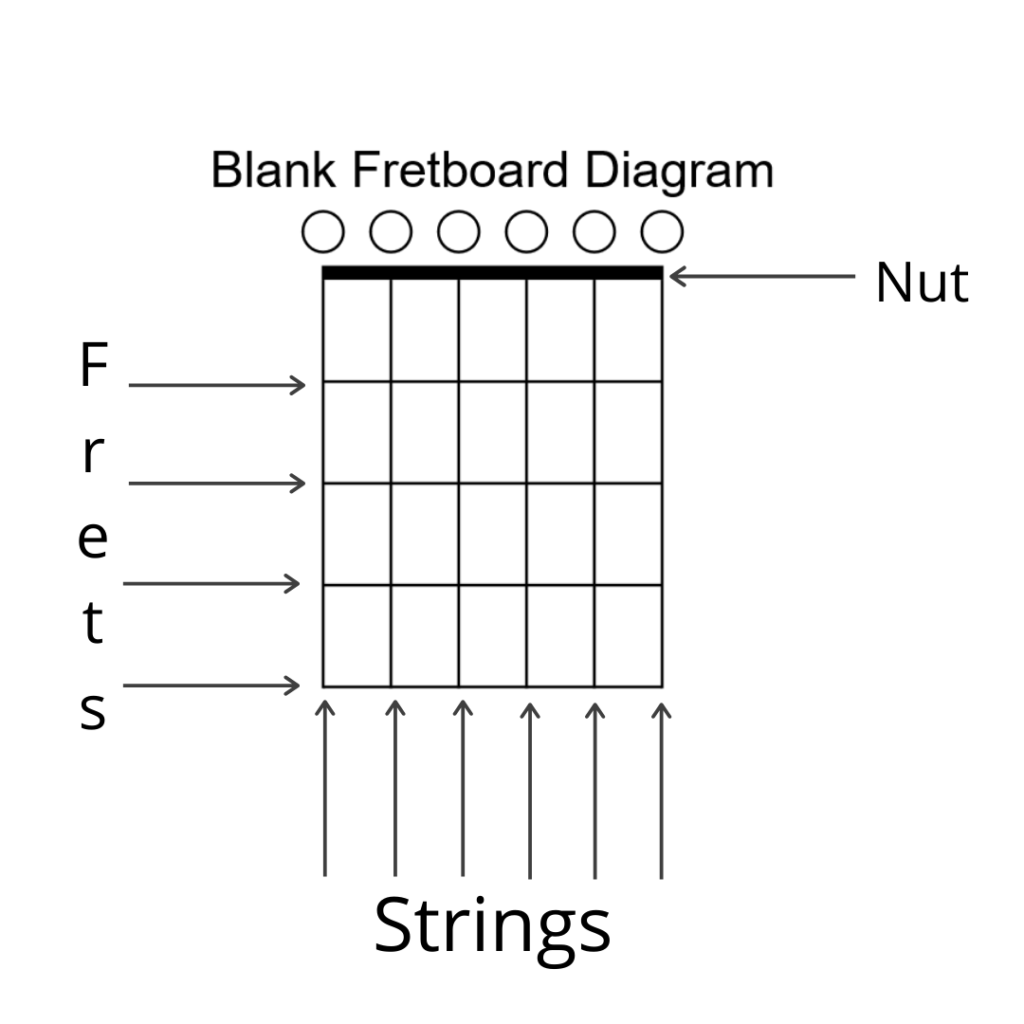
The chord diagram is a visual representation of the guitar fretboard.
The horizontal lines represent the fret wire, the vertical lines represent the strings. The lowest tune string is on the left, the highest tuned string is on the right. A thick horizontal line is the nut.

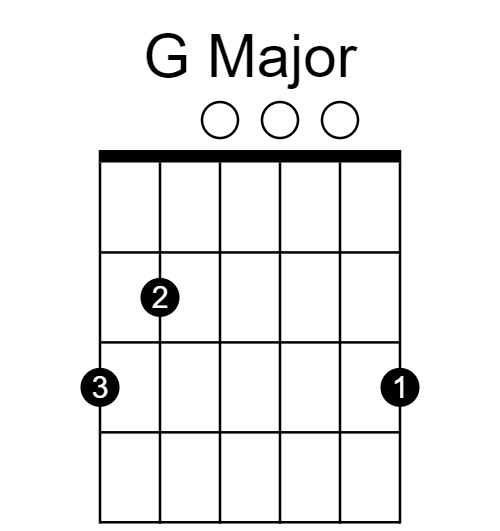
Fingering is shown using a number in a circle: Index/Pointer finger = 1, Middle finger = 2, Ring finger = 3, Pinky = 4. An empty circle above a string means play an open (that is, don’t put your finger on it) string.
Here is an example of a chord diagram of the G Major open position chord to illustrate:

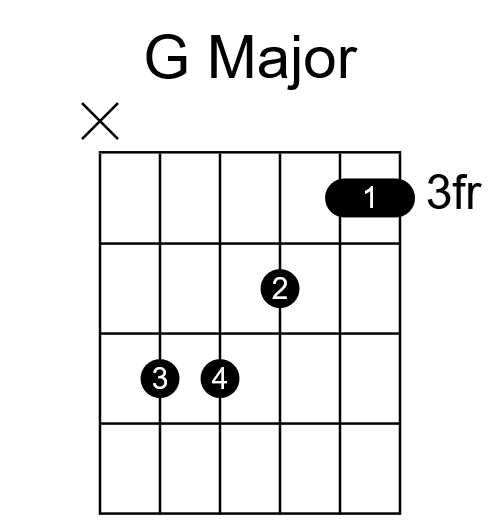
If the diagram shows an X above a string, that means don’t play it or mute it. For example, here is a G Major partial barre chord played on the third fret:

Notice the “3fr” to the right of the diagram. If the diagram doesn’t start at the first fret, it will tell show you a fret number next to one of the frets so you know where on the neck you should be.
Also notice, the partial barre covers two strings – the 1st and 2nd string with the index/pointer finger.
And that’s how to read a chord diagram. Now you’re all set to use sheet music with chord diagrams or pick up a chord dictionary to learn new chord shapes.
Questions?
If you have any questions or you are interested in a free trial lesson, click the button below.
1 thought on “How to Read a Chord Diagram”
Comments are closed.